
Code Shaper – optimizing developer workflows using code generation
Starter templates and code generators are a popular way for developers to get started with a new language or a framework. However, many of them fail to support an efficient and robust development workflow. Most code generators lack production-grade tooling, have limited generation capabilities, and make it hard to share customizations.
Today, I'd like to introduce you to a code generation platform called Code Shaper. It's designed from the ground up to solve these problems. Here are some highlights:
- It's modular, so you can add production-grade tooling
- It includes off-the-shelf generators for popular frameworks like React, Next.js, and Remix
- You get opinionated choices for linting, testing, component development, and mocking APIs
- It lets you build custom generators if you need to customize your workflows
- You can share generators with your team, using registries like npm
Code Shaper makes your workflows speedy, consistent, and standardized. Let's build a simple Next.js app to get a feel for how Code Shaper can optimize your workflows.
Below is an abbreviated version of the full docs on the Code Shaper site. You can go there directly for the full exercise or to pick other frameworks to try out.
Getting started
Code Shaper allows you to create multiple artifacts in a single repository. These could be web applications, reusable libraries, code generators or anything else that you can imagine. Each artifact gets its own workspace. You can think of workspaces as the building blocks of your repository.
Setting up Code Shaper involves two steps:
- Creating a new repo
- Adding one or more artifacts to it
Step 2 can be repeated any number of times to add artifacts that use different languages and frameworks.
So let's get started by creating a new repo.
Create a new repo
First, we'll create a new repo that will be used as a foundation for adding various artifacts like apps and libraries. A few prerequisites you should have before continuing:
-
Make sure that you have Node Version Manager (NVM) installed on your machine. NVM allows you to use different versions of node via the command line. To install NVM, follow the instructions below:
NVM for MacOS
NVM for Windows -
Make sure that you have an IDE installed that understands TypeScript. Visual Studio Code (free) and WebStorm (paid) are both good choices.
# Change directory to a location where you normally create new projects,
# e.g. ~/projects
cd ~/projects

# Create an empty directory for our repo and cd into it.
# Repos are usually named with kebab-case.
mkdir movie-magic
cd movie-magic

# Create an empty package.json file
npm init -y

# Install Code Shaper and its repo plugin
npm install code-shaper @code-shaper/repo

# Run Code Shaper and follow the prompts to initialize turborepo
npx shaper
? Which plugin would you like to run? Repo
? Which generator would you like to run? turborepo
? This generator will overwrite some files in your repo. Ok to proceed? y
Code Shaper has now initialized the repository with Turborepo and a new package.json file. Execute the following commands to install the new dependencies and then make an initial commit:
# Initialize a git repo in the current directory
git init

# Use the required version of node.
# If the required version of node is not installed on your machine,
# you will be prompted to install it.
nvm use

# Do a clean install with the newly generated package.json file
rm -rf package-lock.json node_modules
npm install

# Make an initial commit
# We will commit at the end of each step to mark its completion.
# Note that we are using the conventional commit spec for commit messages.
# The `npm run commit` command helps us with this using prompts.
# This is equivalent to executing the following git command directly:
#   git commit -m "chore: initial commit"
git add .
npm run commit
 ? Select the TYPE of this change (required): chore
 ? Select the SCOPE of this change (optional) (press enter to skip): <press enter>
 ? Finish this SHORT sentence (required): "Applying this commit will...": (max 100 chars)
 initial commit
 ? Provide a LONGER description of the change (optional): (press enter to skip): <press enter>
 ? Are there any breaking changes?: No
 [master (root-commit)] chore: initial commit
Now that our repository is all set up, let's add our first artifact. We'll start with a Next.js app.
Create a Next.js app
Install Code Shaper plugin for Next.js.
npm install @code-shaper/nextjs
Now generate a Next.js application. By convention, applications are created in the apps directory. Let's create one there.
npx shaper
? Which plugin would you like to run? Next.js
? Which generator would you like to run? app
? Application name? movie-magic-nextjs
? Parent directory? apps
? Package name used for publishing? @movie-magic/movie-magic-nextjs
? Would you like to use Tailwind CSS? Yes
Now execute the following commands for further setup and commit of all changes:
# Create a local environment file for movie-magic
cp apps/movie-magic-nextjs/.env.example apps/movie-magic-nextjs/.env.local

# Install dependencies:
npm install

# Build and run the app to make sure it works
npm run build
npm run dev

# Point your browser to http://localhost:3000/.
# You should see the running app.

# Run Storybook to make sure it works
npm run storybook

# Point your browser to http://localhost:6006/.
# You should see the running Storybook.

# Commit
git add .
git commit -m "chore: add movie-magic-nextjs app"
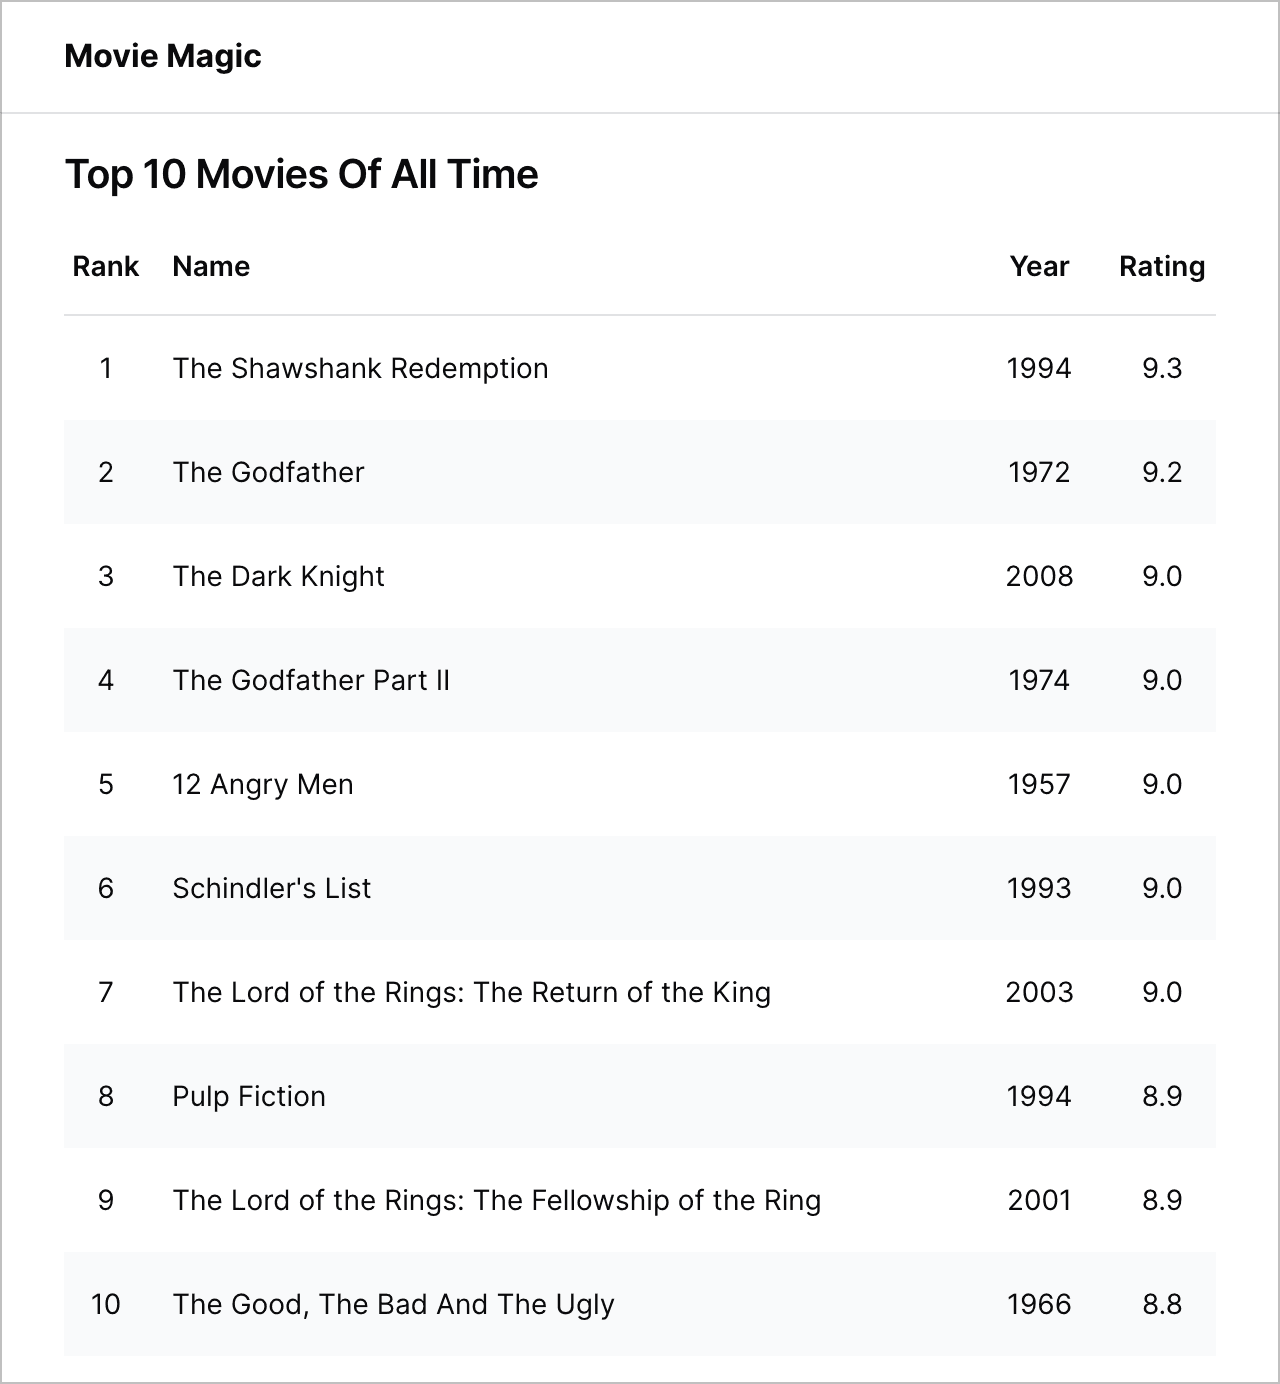
We're now ready to extend our starter app. As you might have guessed from the app name, we're going to build an app that shows you the top 10 movies of all time - magical.
Extend the app
Run the following command in the root directory of your repo to install the libraries we will use for this example.
npm install clsx axios @tanstack/react-query --workspace @movie-magic/movie-magic-nextjs
Create TypeScript definitions
Let's start by creating TypeScript definitions for data structures that we will
need in our app. Copy the following 4 files from the
completed example
into your apps/movie-magic-nextjs/src/models folder:
index.tsMovie.tsPaginationInfo.tsQueryParams.ts
Create a MovieList Component
Now we will create a MovieList component that receives a list of movies and
displays it. Such components are called presentational components - they don't
worry about how the data was obtained, their job is to simply render it.
We will generate the <MovieList> component using the component generator
provided by the Next.js plugin. Follow the steps below:
npx shaper
? Which plugin would you like to run? Next.js
? Which generator would you like to run? component
? Component name? MovieList
? Which workspace should this go to? apps/movie-magic-nextjs
? Parent directory within workspace? src/components/MovieList
A placeholder MovieList component has been created for you. Also a placeholder
Storybook story has been created. Let's implement MovieList interactively
using Storybook.
npm run storybook
Point your browser to http://localhost:6006. Storybook shows the placeholder
implementation of MovieList.
Implement the MovieList component
We are now ready to implement the real MovieList.
- Create the data to render movies. Copy the
movies.tsfile from the completed example into yourapps/movie-magic-nextjs/src/mocks folder. - Overwrite the placeholder implementation of
MovieListatapps/movie-magic-nextjs/src/components/MovieList/MovieList.tsxfrom the completed example. - Overwrite the placeholder story for
MovieListatapps/movie-magic-nextjs/src/components/MovieList/MovieList.stories.tsxfrom the completed example.
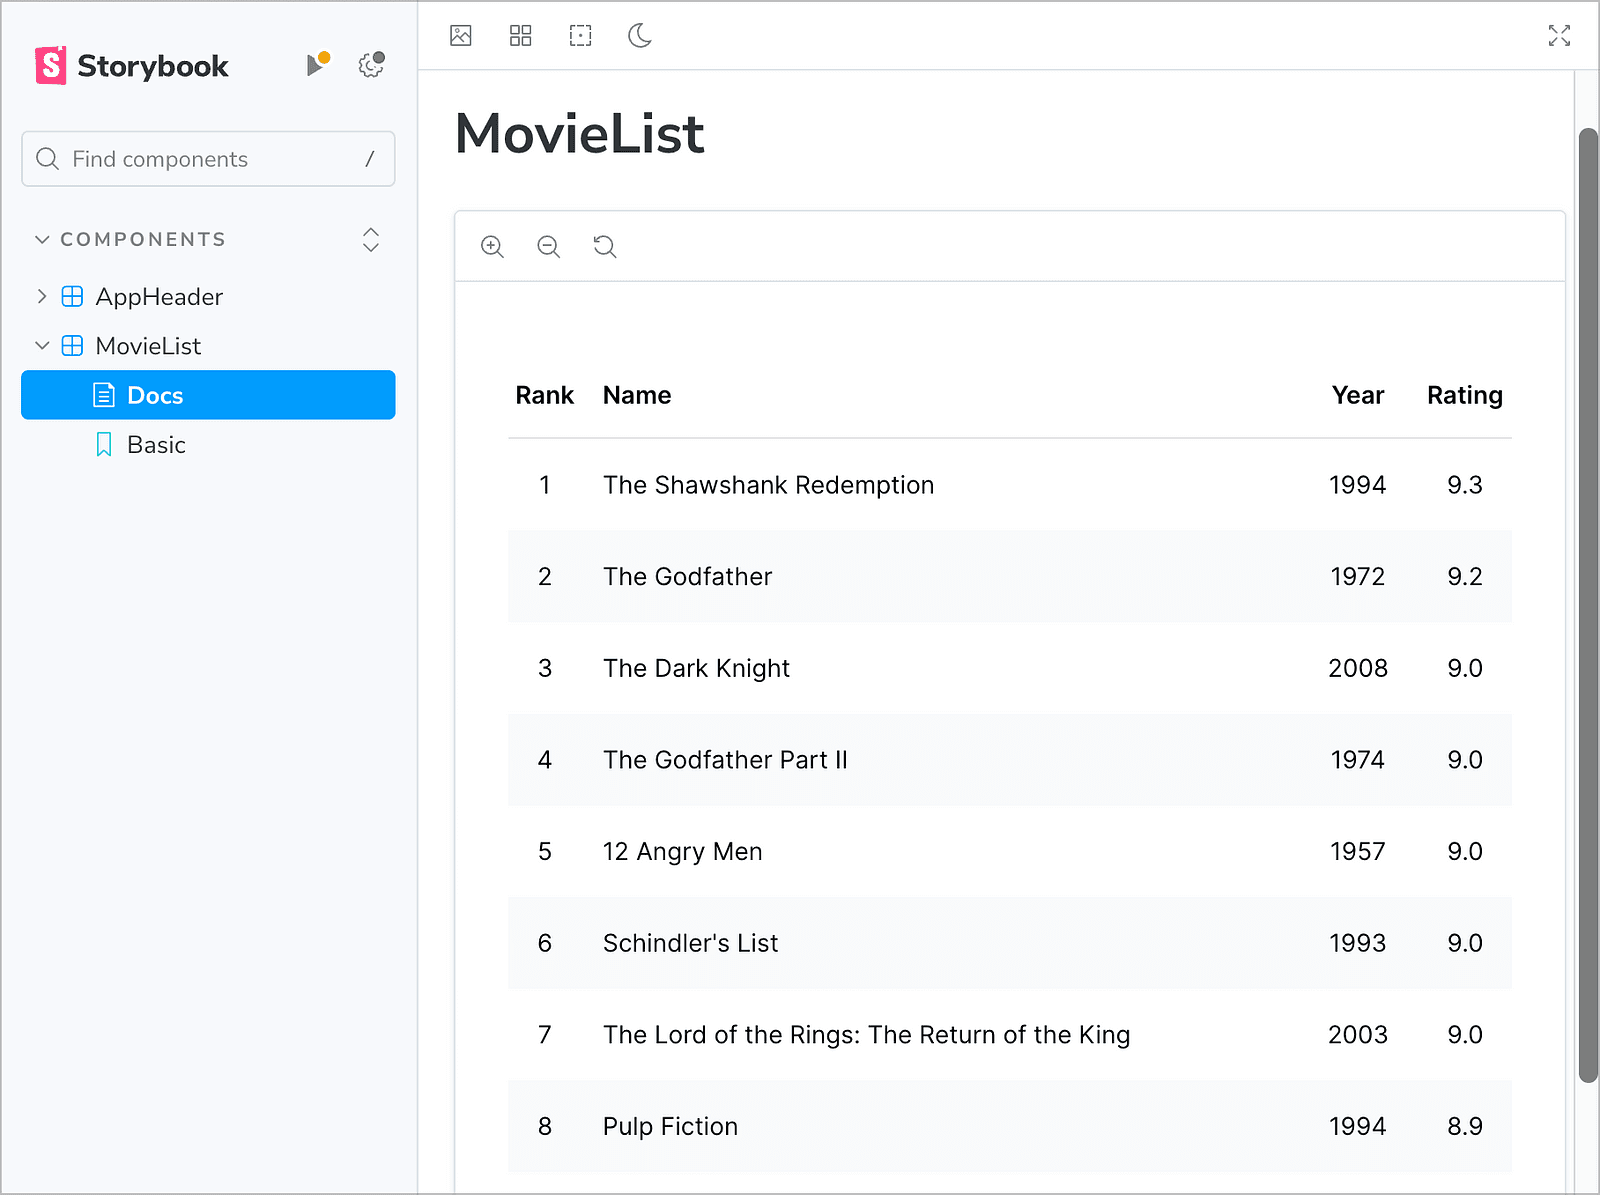
Here's a snapshot of the final Storybook story.
Test the MovieList component
It's good to write unit tests for our components to ensure that:
- they are working correctly,
- they keep working correctly when any code in your repo changes.
Let's write a unit test for the MovieList component. This one ensures that it
renders the correct number of movies. You can find more best practices for unit
testing in
React Testing Techniques.
Overwrite the placeholder test for MovieList at
apps/movie-magic-nextjs/src/components/MovieList/MovieList.test.tsx from the
completed example.
Run the tests from the root directory. All tests should pass.
npm test
MovieList is now fully implemented, let's commit the code:
# Commit
git add .
git commit -m "feat: add MovieList"
Recap
This exercise should have given you a feel for how Code Shaper can optimize your workflows with code generation. Now that you've created a sample app, you can see how a quality code generation platform can help you build robust applications faster.
Here are some additional resources to explore:
- Getting Started - an in-depth tutorial covering more features of Code Shaper
- Off-the-shelf plugins
- Create your own custom generator
- Movie Magic - An example of using Code Shaper to generate applications using a variety of frameworks